Thursday, January 19, 2012

How to Give Your Inbox a Makeover With GoSMS Pro

Some people are okay with using the native messaging app on their phone, until better apps come along. When I first got my Android phone, I thought the bubble conversation style in the HTC Sense UI was cool enough. Then I discovered GoSMS Pro. The creative side of me went right to work and I customized to my heart’s content.
My colleague here at Appstorm, Sam Cater, wrote about the awesome features of this app a while back. I agree there are a great variety of features to explore in this app if you’re the kind of person who communicates more through SMS than through phone calls. Extreme customisation may be too much for some people, but for those who are into it, this app is perfect.
To get you started, here’s a compilation of quick customisations you can apply to GoSMS Pro.

Changing the Background

The Conversation List Background

The conversation list shows you the most recent message sent to each of your contacts.
When you first install the app, it will probably default to the GoSMS Theme. You’ll need to change this first by going to Menu > Theme and choosing DIY theme.
Change to DIY Theme first!
When that’s done, hit Back to return to the main SMS screen. Press Menu, tap Settings > Advanced > Appearance Settings > Conv. list customization. You should get a similar screen to the one shown below:
Customization screen for Conversation List view
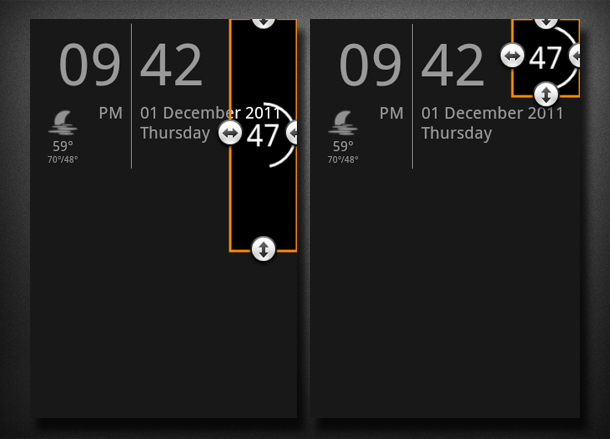
You have two choices that might be confusing: Change wallpaper and Background. Both options allow you to choose between changing it to Color or Image. The difference is that with Change wallpaper, the changes are applied to the Message bar on top of the conversation list, too. Here’s an example:
Background color vs. wallpaper image
It’s up to you which option you select; it’s just a matter of preference. When choosing Image, you can choose any image from your phone’s photo gallery (or SD card, if you have a file manager installed).
If you choose Change wallpaper make sure the Background color settings are set to zero (all nodes should be to the extreme left). This will eliminate any conflict with the image you’ll set as the wallpaper.
When you’re happy with the changes, just hit Back. The app will prompt to either overwrite your existing settings, or save your changes as a new setting. It’s always best to save them as a new setting. These settings can be retrieved when you go to Appearance Settings > Conversation list appearance > User defined settings.
Save your settings!

Conversation Background

Individual conversation lists show the messages sent to and received from your contacts. The process for customizing this view is similar to the previous routine, but with a few differences.
This time, go to Settings > Advanced tab > Appearance Settings > Conversation customization. The setup screen should look like this:
Conversation settings
Assuming you’ve already changed your wallpaper for your Conversation list view, the app automatically changes it for this view as well. You can tap on Reset here to start from scratch, or continue to use the same wallpaper. The process of changing the background is pretty much the same.
You can set different backgrounds for different contacts’ conversations. From the Conversation view, press Menu > Individual > Conversation, select DIY Theme, and make the customisations as above.

Changing Fonts

It’s important to note that GoSMS Pro, however fully-featured, does not have built-in font packages to support changing fonts. For this customisation, you’ll need to find fonts on the Market. Most of them are not free, but one that is free and has a decent amount of fonts (75 to be exact) is FontSMS (Pro). Install this but do not open the app.
Open GoSMS Pro and press Menu, then select Settings > Appearance Settings > Scan Font Packages. It should be able to find the FontSMS package.
Scan for fonts first!
On the same screen, you can choose which view you wish to change the fonts in: Conv. list customization (for the conversation list view) or Conversation customization (for Individual Conversations view). In the example below, I’ve chosen Conversation customization.
As you can see, the fonts are divided up, into Incoming font, Outgoing font, and Date font. You can also change the font background color (for Incoming and Outgoing), as well as the Date font color. In this example, we chose Incoming font. Tap the drop-down box next to Package and you should see the option for FontSMS Pro.
List of font areas you can change
If you have text-heavy apps installed, like ebook readers and note-taking apps, chances are you’ll also find them among the list of font packages. If not, then FontSMS Pro should be more than enough with its 75 fonts.
Once you’ve chosen FontSMS Pro, tap the drop down box beside Font and select a font. You can also change the style from Normal to Bold, Italic or Bold Italic. Tap the plus and minus signs on the bottom to increase or decrease the font size.
FontSMS Pro package
If you’re happy with your fonts, make sure to make one last preview before saving your settings. Hit the back button again and choose to New to save the settings. Remember, these settings are not just for the fonts, but all the changes you made on this screen. These settings can be retrieved when you go to Appearance Settings > Conversation appearance > User defined settings.
Enjoy your new fonts!
New bold fonts, for livelier conversations!

Customizing the Notification Popup

The popup window is that small box that appears when you get a new message. This can be enabled or disabled in Settings > Basic > Enable popup windows. If you use these popups, you’ll be glad to know you can also tweak their appearance.
To change the popup settings, tap on you Menu key, go to Settings > Advanced tab > Appearance Settings > Popup window customization. You should get the screen below:
The Popup customization screen
To change the background, choose Background. Again, you can choose between Color and Image. To change the image, just tap the radio button and then the square box below. As before, you may choose images from your phone or SD card. You can also set the transparency of the image using the slider on the bottom of the screen.
Changing the background for popup window
To change the fonts, hit Back and choose which fonts to change: contact name, contact phone number, time or message. You can also use font packages in this screen. As always, save your settings. The settings can be retrieved in Settings > Advanced > Appearance Settings > Popup window appearance > User defined settings.
A new popup window customized!

Conclusion

GoSMS Pro certainly encourages the artist in you with its inexhaustible features – maybe even some that were not covered here – so it’s up to you to maximize it. These steps take a lot of getting used to but it’s well worth the effort. If you’re lost, you can always start again. Just make sure you have a clear idea of what you want your screen to look like, and have an ample amount of images and wallpapers ready for experimentation. No one gets it perfect the first few times, so patience and creativity is key.

appstorm

How to Install Android on the HP TouchPad

I expect you’ve heard about the HP TouchPad, a tablet running webOS that was heavily discounted (to just $100) shortly after it was released a few months ago.
The main problem with the TouchPad was that it didn’t support the latest apps, since app developers are not excited to develop apps for webOS as is not available on many devices. In October we reported that Android would soon hit the TouchPad, and now it has. Read on to find out how to install it.

This is not an official Android build for the TouchPad, it’s a version of CyanogenMod – meaning it offers even more features than the official build. The current version of CyanogenMod for HP TouchPad is Alpha 3.5, which is based on Android 2.3.7: Gingerbread. (No, not the tablet-optimised Honeycomb or Ice Cream Sandwich.)
As the number suggests, this isn’t the first alpha build, but offers lots of improvements and bug fixes over those that came before it. In particular, you will be able to enjoy the 3D games on your TouchPad with improved speed, translating to a better and smoother gaming experience. Video Playback has also been improved, so you can enjoy watching movies or even just videos that you’ve shot yourself.
You should be aware that installing this ROM will void your warranty, and that there will be some bugs. However, this is a dual-boot system, so if you ever want to load webOS again, you can do that.

Prerequisites:

Here is a list of files that you’ll need to obtain using the respective links given.
Download all of the above files to your computer. Some of the links point to the forum thread, so you need to find the specific file yourself from the list of downloadable files. Once it’s done, follow the procedure given below.

Let’s Get Started

These instructions mainly assume you are running Windows, but if you are familiar with the command line you can follow them on Linux or OSX, too.
  • Start up your HP TouchPad, obviously, in webOS. Then, connect it to your PC via the USB cable and  from the TouchPad Menu, select the USB Drive mode to allow file sharing between PC and the TouchPad.


    Select USB Drive mode to enable file sharing.
  • On your PC, you will be able to see a new drive mounted under My Computer (or just Computer, in Windows 7). Open it and create a new folder called cminstall. Transfer the Cyanogenmod, Clockworkmod Recovery, and MoBoot files to this folder.

    Place the downloaded files in cminstall folder.
  • It is recommended that you have at least 2GB of free space in your TouchPad to avoid any problems during the process. When the file transfer completes, just eject the USB cable from your PC.
  • We will now install the Bootloader on the TouchPad. First, press and hold the Power button and select Shut Down. It will turn off the device.

    Select the Shut Down option to turn off the TouchPad.
  • Now, turn on your TouchPad and quickly press the Volume Up button. It should show you a USB symbol on your screen; if not, shut it down and try again.
  • From the files that you have downloaded, extract ACMEInstaller.zip to the folder where you installed Palm Novacom. On Windows, this should be C:\Program Files\Palm, Inc Mac and Linux would have different paths.
  • Now, you need to open the command prompt, and switch to the Novacom folder. In Windows, you can do this by navigating to the aforementioned folder, holding the Shift button and right-clicking anywhere on blank area, then choosing Open command window here from the context menu that appears.

    Select the highlighted option to open Command Window.
  • Run the following command in the Command Window:
    novacom.exe boot mem:// < ACMEInstaller 

    Run the command in the Command Window.
  • The flashing of CyanogenMod to the TouchPad has begun; in just a few seconds, your TouchPad will reboot and – voila – you will see a Linux-style boot screen. A list of files that are loading will appear and, once it finishes, you will have a tablet that is running on the Android OS. Yep, we did it, we successfully installed Android on the HP TouchPad.

The new look of the TouchPad, running Android.

Your HP TouchPad is now running the Android OS, thus having all the advantages of this great OS. As I said earlier, we have not actually removed webOS; instead, we have added a new OS alongside it. You can boot up in webOS at any time by choosing boot webOS from the recovery menu. I hope you guys enjoy having Android on your TouchPad. If you have any question about this, please leave it in the comments section. We will be glad to help you out.

Bubble Bubble 2 - iOS Game

Bubble Bubble 2 on Iphone has launched now!

The inspiration of Bubble Bubble 2 came from deep-sea fish and bright Neon Concept look good together. The pretty Neon fish need to survive, and raise it bigger!
To survive, dodge yourself with accelerometer to run away from evil fishes coming after you.
Yet the game is simple, it is so catchy and works well for killing time.

The Bubble Bubble 2 has following features;

1. Pretty Neon designed fish

The deep-sea fishes and neon design works well. they show fantastic and mysterious view with dark background of deap sea.

2. Various characters and Evolution system.

You can gain experience points from munching enemys following you while item works.
As the experience points reaches certain point, your fish will grow. By completing
evolution of fish, new character will be able to choose.

3. Various items and skills.

Various items effects differently, and new skills will be shown according to your current fish.

Follow us
http://www.twitter.com/TheGreenGames

Facebook
http://www.facebook.com/TheGreenGame

E-Mail
nicekhj3@gmail.com
What's new in Version 1.6
- bug fix
- change level of difficulty
- manage localizations 

Wednesday, January 18, 2012

The Best Way to Synchronize Android With iTunes

Whether you have a Mac as a main computer or you use an iPod or an iPhone to complement your Android device, there’s a good chance that your music collection is all organized and kept in iTunes. Out of the box, your Android smartphone isn’t supposed to play nicely with iTunes to sync music and playlists, but, if you follow this tutorial, your phone and iTunes will become the best of friends.

Step 1: Set Up iSyncr Properly

iSyncr is an Android application for both Windows and Mac that synchronizes your iTunes playlists to your SD card, as previously explained in details by Ruairi. In order to get the most out of iSyncr with iTunes, here are the essential steps to take:
  1. In the Android iSyncr app settings, make sure “Play Count Logging” and “Auto Clean Playlists” are ticked and that you have adjusted the Playcount Sensitivity and Skip Threshold to your liking.
  2. In the computer component of iSyncr, get to the options and tick “Sync iTunes Album Art” and I’d recommend “Remember Selected Playlists” as this will help you not have to re-select your playlists every time.

Settings for iSyncr on Android and the computer

Step 2: Set Up PlayerPro Properly

There are several music players that can work nicely with iSyncr; however, from personal experience, I have found PlayerPro to be the best by strides. Tessa Thornton has already reviewed Playerpro for you so I won’t dwell on everything that it can do. I will, nonetheless, tell you that the reasons PlayerPro works best with iSyncr is its ability to synchronize play counts, lyrics, and ratings, aside from the obvious album art and ID3 tags. If you’re like me, and you have several smart playlists in iTunes that rely on ratings, skip counts, play counts, and other tiny details, then you will find this to be a great solution.
These are the settings you should pay attention to:
  1. In General Settings, under Scrobbling, make sure Simple Last.fm is picked. This will make sure the play and skip count are sent to iSyncr and hence iTunes.
  2. In General Settings, under Rating System, pick iSyncr. PlayerPro will then display the ratings you already have in iTunes and sync back any new ones you change on the phone.
  3. In Look And Feel, make sure Prefer ID3 artwork is ticked. This will use the album art embedded in the song’s details instead of checking the SD card and cache for one.

Settings for scrobbling and ratings in PlayerPro

Step 3: Enjoy the Result

The end result is an experience between your Android phone and iTunes that is as close to an iPod as possible, if not similar. Playlists are synchronized, along with artists, albums, embedded album art, lyrics, ratings and other ID3 tag details. Changes in ratings, play counts and skips are sent back to your iTunes library so your smart playlists there take that into account.

iSyncr and PlayerPro widgets with album art and ratings, and lyrics in PlayerPro

Bonus: Remote Control Your iTunes

For those times when you don’t want to have your whole iTunes collection on your phone, but want to control your music remotely while it plays on your computer, there’s Remote For iTunes. After a simple setup process, you are granted access to your complete iTunes library, including playlists, albums, artists, genres, as well as a full search function. In terms of playback, you can view the song’s details, skip, rewind, pause, and activate shuffle and repeat.

iTunes Remote playing screen and library browsing
Do you use iTunes with your Android phone for music? If so, have you found another way to make them work together perfectly, or is this tutorial an answer to your previous problems in synchronizing them together? Let us know!

Create a Minimal Lock Screen With WidgetLocker

When it comes to design, I am a minimalist. But, more than that, I am a perfectionist. When I work on a new design, I do everything I can to get it exactly right. The same thing happened when I sought to make myself a minimal lockscreen after buying the new version of WidgetLocker. So, this is my attempt at a minimal lockscreen, using a couple of widgets to show the date and time, a SMS/Missed call counter, the current weather, battery percentage remaining, current music track, and of course the actual unlocking slider.

My Minimal Lock Screen


Setting Up WidgetLocker

First thing we need to do, is adjust the grid size of the lockscreen so that it can accommodate everything we throw at it.
After you have downloaded and installed WidgetLocker, go to Settings > Look and Feel > Layout. Once here, adjust the anchor size to span over two rows. Now, turn off ‘Automatically determine grid size’ and set the Rows to 3 and Columns to 4.

Custom Slider

The custom slider used here is a theme made by XDA member formicae. In order to apply the theme, download it from here (you need to be an XDA Forums member, which is free). Then, put the zip file in ‘/sdcard/data/com.teslacoilsw.widgetlocker/themes‘, and the theme will get installed to your WidgetLocker.

Date and Time

For the date and time, I used SiMi Clock. It is a great app that isn’t a resource hog. It also comes bundled with a small weather and battery widget.
An alternative minimal clock would be Minimal Clock Widget.

SiMi Clock Widget

SMS/Missed Call Counter

For the SMS and Missed call counters, I just used a simple app called SMS Unread Count. SMS Unread count, despite its name, provides an overall count of unread messages, unread emails, and missed calls.
The tricky part is using minimal icons with it. Here are the icons I used: Dialer, and SMS. Check out this article for instructions on how to replace the icons.
An alternative to this widget is using SMS Unread Count is using ADWNotifier. It will provide the notification bubbles on your lockscreen even if you aren’t using ADW Launcher.

SMS Unread Count

Weather

I had a really hard time finding any free minimalist weather widgets. But luckily for me, SiMi Clock had one built in.
Beautiful Widgets is another great weather widget app. It has plenty of minimal themes to choose from, but it carries a price tag of $2.89. I am considering buying it.

Battery Indicator

For the battery level indicator, I used Circle Battery Widget, which is free and very tiny. It has sizes ranging from 1×1 to 4×4 (useful for tablets).
An alternative app to this is the battery indicator widget bundled with SiMi Clock.

Circle Battery Widget

Music

A major concern for music widgets on lockscreen is that they might start playing even when the phone is locked.
Phantom Music Control is a great solution to that problem as it has the ability to hide itself when no music is playing. So, unless you are already listening to music, no widget on the lockscreen.
Phantom Music Control works with the most of the major Android Music players: the stock one, PlayerPro, and PowerAMP. But some music players only work with the $1.99 pro version of the app.
Phantom Music Control also has some pretty slick themes so that you can choose the look you like the best. Again, some themes are only available in the pro version. I bought the pro version as I just had to have the ‘Metro’ theme.

Phantom Music Control

Putting It All Together

Arranging it all is the trickiest part of the whole setup. We don’t want the widgets to be too small, so increasing the grid size is not an option.
Here, we are going to make use of WidgetLocker’s ability to overlap widgets while resizing. To turn on this feature, go to Settings > Advanced, and turn on ‘Widget Overlap’. Now that that’s done, start by putting the SiMi Clock Widget on the top, and resize it to span two rows.

SiMi Clock Widget
Next we add the weather widget. Long press the screen, and choose Widgets. There, choose SiMi Clock Widget. Change the weather settings to meet your needs and press ‘Save’.
Now, place the widget directly under the clock widget on the extreme left of the screen. Here comes the tricky part: long press the widget and choose ‘Resize’, now grab the upper anchor of the widget, and move it up one row. Next, grab the lower anchor and move it up one row as well.

Resize the Weather Widget
Now that we have our clock and weather up and running, its time to add the battery widget. I’m using the 1×1 widget and I recommend you do the same. Do what you did with the weather widget; put it directly below the clock widget, on the extreme right of the screen. Now, move the upper anchor up by two rows, and do the same for the lower anchor.

Resizing the Battery widget
Now that you have the tricky part out of the way, go ahead and add the music widget. Make sure you turn on ‘Hide Widget while playback is stopped’ so the widget only appears on your screen when you need it to.
Next, add the custom slider. For this, long press on where you want to add the custom slider, and choose ‘Custom Slider’; after this, tap the “theme” drop-down menu, and choose “Minimal”.
The final step is adding the SMS/Missed Call widget. If you followed the steps mentioned here, you should be able to select those icons for your widgets. Select which widget will be for the SMS notifications and which will be for dialer notifications, and you are good to go.

Conclusion

And, that’s pretty much it! That is all you need to do, in order to get a minimal lockscreen. Don’t be afraid to try something else, show us your go at a minimal lockscreen or any other lockscreen in the comments.

Poor Reception? Make Calls Over Wi-Fi With Google Voice and GrooVe IP!

I have Verizon as a service (shame on me), and although it supposedly covers 98% of America, my apartment seems to be an exception. Even checking on a coverage map it shows I am hopeless. After much aggravation and trying everything I could get my hands on I talked with my brother, a fellow avid Android user. He and I put our heads together and came up with a great solution: Google Voice plus GrooVe IP.
It’s as easy as the first level in Teeter. Seriously, it is and it’s free! The duo I pair together here to make Wi-Fi calls are just like a comic book duo: Google Voice is to GrooVe IP as Batman is to Robin.
We all – well, those who read Android news – know about Google Voice (GV for short). Some of us use GV already while others aren’t offered it based on their region. What you may not know is how to use it to fix your frustrating problems with dropped calls.

There Is Hope for You

If you don’t have good reception at home, and you have a Wi-Fi setup you can connect to with your phone, then GV is your answer. I’m not going to review the whole app (see here for that); I mainly want to focus on getting your calls through your wireless network, as simply as possible.

Download Google Voice

First I want to make sure you have set up a Google Account. Assuming you’ve done that, download the Google Voice app from the Android Market.
Once downloaded, sign in and tick one of the “Making calls” options. In here I check to ask every time I make a call. What this enables me to do is forget it’s active and just make calls like I usually do, only with one or two more button presses. When connected to Wi-Fi it prompts the user to ask if they would like to make the call with or without GV.

Make GV selection here

VoIP Calls

Your next download should be the GrooVe IP app. The only version available is a paid app, for $4.99.
GrooVe IP allows you to make VoIP (Voice over Internet Protocol) calls. Now we need to sign in to our Google Voice account through GrooVe IP and then we can configure the rest.

GrooVe IP settings
We could enable an option to let us make calls over 3G/4G, but we won’t worry about that for now. We only want to allow calls when Wi-Fi is available, simply because when we are connected to Wi-Fi the system will prompt us so we don’t have to search for the options ourselves. This way, after selecting GV, it will give us the choice to use GrooVe IP for calls (as opposed to the mobile network, which lets the user place calls over 3G/4G).
What I want you to do is let the app auto-start, because when Wi-Fi is enabled this will skip yet another step and prompt for us. This setting can be found in Settings > Miscellaneous > Auto-start. While we’re here we also have the option to disable notifications; if you’re a status bar clutter freak like I am you’ll tick these boxes.

GrooVe IP notification checkboxes
The ability to be prompted saves a ton of work for the everyday user and is great. If you are not connected to Wi-Fi the system will not prompt you to call using GrooVe IP, thereby subtly letting you know that your device is not currently connected to a wireless device.

All Set

Now that you’re all set up and signed in, every time you make a phone call you will be prompted either to use GV or to make the call without it. If you choose to make it with GV then you should select GrooVe IP in the next prompt, and it will connect your call to the chosen recipient. If you choose to select to make the call without GV it will simply continue the way it always has to make a standard phone call.
The quality of the call will greatly depend on how strong the WiFi connection that we’re using is.

Call is placed
So, this pair of apps work fantastically well together! The ability alone to shine through a carrier’s dead-zone was enough for me to give it a shot. I highly recommend these two to anyone with a smartphone and poor reception at home or at the office. A friend of mine works in a basement, and uses the exact same setup to place calls without flaw. As long as there’s Wi-Fi or a hot-spot available, the ability to place a call will be readily accessible.

Google Voice: Multiple Phone Forwarding and Visual Voice Mail

Google Voice was initially released to a small group of people who had signed up to receive an invite and be involved in product testing. I was one of those few…and I loved it.
Initially I jumped on it for its visual voice mail implications but soon realized its true potential. Not only can it store your voice mails on your email with its translation to text but it allows you to have it ring multiple devices. The ability to ring your work, home or mobile with the same number is why a lot of small businesses love it. It has now been opened up to the (US) masses and has really taken off.

Choosing How to Use Google Voice

Google Voice initiates calls by placing a call to a Google Voice access number and then connecting to the selected contact. The website initiates calls by placing a call to your phone then connecting you to your contact. Google Voice voice mail uses a placed call to initiate the call to your contact.
You can choose from these settings:
  • Use Google Voice to make all calls.
  • Do not use Google Voice to make any calls.
  • Only use Google Voice for international calls.
  • Ask every time you make a call.

Placing a call with Google Voice set to prompt
You can customize the app to enable certain phones to ring when a selected group of numbers calls, or if you are called during a specific period. With this you can have the same phone number ring at the office during work hours and at your home otherwise; also, if you leave the office you can take your calls with you as well. This means you are never out of reach, as long as you have data connectivity.
The notifications tab allows you to enable push notifiers for real-time updates and customize other settings as well as seen below. Messages are broken up into quick view boxes that let you know who left the message, the time and also whether it’s a text or voice mail.

Google Voice notifications menu on Android

Read It Aloud, Please

Google Voice also can transcribe the voice mails you receive out loud. If you think the new Siri for the IPhone 4S is quirky you should hear this automated voice. It’s a great alternative for calling and listening to your mail and even the visual voice mail option.
With the visual voice mail the ability to immediately pause and rewind and listen again to certain pieces is a very attractive feature. Messages can stay in storage or be deleted at your will. Alternatively, you can log on to your computer and save them to that.

Folders to choose from
If you haven’t jumped on the Google Voice bandwagon I do hope you check it out. The setup process is simple: sign in to your Google Account or create one. The whole process takes about ten minutes and there are far more benefits to creating a Google Account than just for these purposes. (Besides, as an Android user, you’ve probably got one already.)
And Google Voice isn’t restricted to Android; you can use it on other mobile phones, on computers, and on tablets.
You’ll just need a touch-tone phone, and a computer that matches certain requirements: Windows XP, Vista, Mac, or Linux; IE6 or above, Firefox 3 or above, Safari 3 or above, or Google Chrome; and Flash 8 or above.

Desktop interface

Options to Suit Your Needs

There are different versions of Google Voice depending on what you are using it for and which mobile platform you want it on. There is an option to sign up and get a Google Voice number or port in your existing number. You can get some features without changing or porting your number, and if you have Sprint as a service it can be used seamlessly for all sorts of purposes: from the voice mail to making calls and sending text messages.
There are also credits you can add via a credit/debit card to make international calls. You are given some credits when your sign up originally so you can test out these features.
The full list of features for users in the U.S. include:
  • using your existing number,
  • receiving a custom Google Voice number,
  • Google voice mail,
  • call forwarding,
  • call recording,
  • text people (now with the ability to text multiple recipients at once),
  • international calling,
  • voice-mail transcription,
  • ListenIn,
  • custom voice-mail greetings,
  • blocking callers, and
  • conference calling.
  • All these are pretty straight-forward but I’d like to point out what ListenIn is. It allows you to know why people are calling before taking their call. They begin to leave a message on your voice mail and you simply hit the number 2 on your keypad to listen in; if it sounds important, you can hit the * sign to jump into the call. It’s a very nice feature for people who want to screen their calls and operates very discreetly.
    Google Voice is currently only available on mobile devices in the U.S., no prepaid, and with it users can make free calls within the US; international calls are billed as defined by the list on the website. Other countries outside the U.S., however, can only make calls – domestic or international – through the web-based platform.
    If you’re using Sprint, you may already have Google Voice, as they included the app in a large majority of their Android handsets. If you have a Sprint Android phone, check out this page for more details.

iSyncr: Seamlessly Sync iTunes to Android

iTunes isn’t exclusively for iPod and iPhone users, but that doesn’t mean it has any Android syncing features built in. iSyncr is a great app for keeping your iTunes library synced to your Android handset, wirelessly. It supports selective playlist sync and automatic syncing. Read on to learn more…

What Is Syncing?

Sync is short for synchronization: keeping things up to date and coordinated across more than one device.
A great example would be how Apple’s portable devices sync. Once they are plugged into iTunes they receive all of the new content available on their PC on their mobile device in a few clicks. Sadly, Android phones come with no built in iTunes-syncing capabilities, but with a community like Android’s it wasn’t long before a developer bridged the gap!

Getting Started

Apart from obvious basics, such as an Android device and a memory card, you will need just one app: iSyncr. It’s not free, but once you begin to use it you will realise that the small price you pay is nothing compared to how much easier copying your music and videos and songs to your phone is.
iSyncr also has several add-ons such as WiFi syncing (without this, your device needs to be plugged in to the computer to sync) and a Mac version, but for this walkthrough I will be sticking with basic iSyncr package.
Once purchased and downloaded, you are ready to begin the setup process!

Step 1: Setting Up the App

iSyncr is a very simple app so the set up is relatively painless. Once you have installed the app, just open it. You will then be presented with an installation screen as detailed in the screenshots below.

The basic setup for iSyncr
Ensure that “install to USB storage” is selected, as this is necessary for your computer to detect the software. Once the installation has completed you will be redirected back to a grid of icons, each with a different function. These icons are not of much use unless the PC software is corrupt so we can leave them alone for now.

Step 2: Selecting What to Sync

The “hard work” is complete! Now you just need to sync your files.
To do this just plug your device in to your computer and mount the USB storage. Open the root folder of your phone and you will see a new file called “iSyncr.exe”. This is the file that the installation process above installed for us; open it and you will be presented with a list of your iTunes playlists.

How to select what to sync
Now just select the playlists that you want to be copied to your phone. As you select your playlists you will see that the bar at the bottom of the window will begin to fill with the more playlists that you select: this represents the amount of space on your phone’s storage, and how much of that space will be taken up by your music.

Step 3: Beginning the Sync

Once you have all the media that you want accessible on your phone selected, and have ensured that there is sufficient space left on your device, click the ‘Sync’ button. You’ll notice iTunes open on your computer automatically, and iSyncr will begin showing its progress on the sync.
While you are waiting for this to finish, feel free to minimise iTunes (but not close it!) and do something else. Depending on the amount of items you selected to sync the time taken will vary greatly. For my 2GB of music it normally rests around the 20 minutes mark, which is very reasonable. Once it has completed syncing you can disconnect your phone.

Step 4: What Next

Once you have your first sync done and everything has been copied over successfully you are ready to enjoy a life free of drag-and-drop!
If you find that your newly synced media is not appearing instantly, give it a few minutes as Android must initiate a media scan of the SD card to pick up new media items. If your items are still not appearing mount your SD card again and explore the folder called “iSyncr”; if all of your synced media is not in that folder you may need to sync again.
Take a look at the various iSyncr plugins on the Market for the aforementioned Wi-Fi and Mac add-ons. The Mac app is a must if you use a Mac (of course!), while the Wi-Fi one is particularly useful for its ability to automatically sync music at specified intervals – great, if you buy new music frequently.

Conclusion

After a month or so of using this you’ll wonder how you ever survived with the primitive drag-and-drop method! Luckily iSyncr is here to stay so you need not worry about having to revert. Perhaps in future updates of iSyncr we may get a few new features that may push Android ahead of iTunes’s syncing features. One that seems to be a common request would be to automatically sync upon mount, which would be very handy indeed.
I hope you enjoyed my guide and enjoy your synced up Android phone!

Tuesday, January 17, 2012

Quickly and easily read and reply to SMS messages using SMS Popup

The typical mode of operation when an Android user receives a text message (or SMS) is to hear or feel the alert, check the notification bar for a quick look at who sent the message, drag the bar down, and click the message from the drop down. From there the user can then read the whole message and reply to it. If you count, you can see that there are four steps before you even get to reading and replying to the message. Now you can make this process a whole lot easier by using the Android app SMS Popup.
With this really cool SMS app, you can set it up so that when you receive a text message you’ll get a popup. From this popup you can quickly read the whole message and even reply to it from the popup. From receiving the message to replying, there’s really only two steps! Read the message and reply! The app cuts out all four preliminary steps to the messaging operation! The app also allows you many settings such as choosing which contacts do what and which ones don’t initiate any popup at all!


Pros

SMS Popup, as mentioned earlier, really does make reading and replying to messages quick and easy. There are very helpful settings for such things as behaviors and you can set it for specific contacts and what not.

Cons

Make sure you check out the settings because at first it can be annoying with the screen popping on with an incoming message and staying on for 30 seconds (this even bypassed my lockscreen). Sure, you can change the settings but it’s kind of strange as a default. Also, the original notification stays in your notification bar until you clear it, but that’s not all that bad.

Conclusion

If you want to cut out all the steps it takes to read and reply to a simple SMS message, SMS Popup may just make your day!